Showing posts with label Crafts. Show all posts

Wednesday, May 21, 2014

Strawberry Jubilee: Summer-Themed Greeting Cards

I'm blowing the dust off of this old blog to bring in a few fresh projects that have been in the works lately. The arrival of the beautiful spring weather got my creative juices flowing and I like to take full advantage of this energy before the heat of summer hits. As much as I dread the heat, I enjoy the bounty of fruit that is in season. My hubby brought back some strawberries from a weekend fishing trip to east Texas, so I thought about photographing them for some summer greeting cards I wanted to make. I had recently restocked my scrapbook paper stash with some lovely new items from Close to My Heart. When I spotted the Jubilee Paper Pack, it just screamed "summer", so I knew it would be great for some summer-themed cards and craft projects. I had fun making these cards. All of a sudden, I have a massive craving for strawberries!

The completed cards:
Here are the initial photos of the strawberries. I printed the photos, leaving a white border in place. I love the contrast of red berries against blue patterned paper: 


I left some negative space at the bottom of this one so that type could be added later:


Here are the individual cards:

Friday, March 22, 2013

Trio of cakes and baking secrets discovered

Blue Cake Trio

I have been doing a lot of baking and cake testing over the last couple of months. Let's just say my waist is not getting any smaller. Thank goodness for neighbors and coworkers who love baked goods! Over the course of these practice sessions, I've learned a few things, although, I still have so much to learn! Luckily, there is a wealth of information out there to help novice bakers like myself, so I thought I would share a few source links for the things that I have discovered.

In the past, I've always had problems with uneven layer cakes. The sides of the layers would not match up when stacked or there would be an uneven dome on the top of each layer, so the whole thing would look off-kilter when frosted. I would try and compensate by sawing off the dome on top and losing a lot of precious cake just trying to level it off. In some cases, it looked worse than if I'd just left things alone!

I recently discovered these Bake Even strips that helped a ton. You can find them here. You basically soak the fabric strips in water to moisten them and then velcro them around your cake pan. They help the cakes bake evenly. I've also heard that lowering the heat in the oven helps. Putting the cake pans in a water bath while baking (as you would do for a cheesecake) also yields similar results.

In my quest for a perfectly smooth cake, I searched online to see if I could find some frosting tutorials out there. I stumbled upon this one from Cup a Dee Cakes that was a huge help to me. I was mesmerized by her tutorial and how easy she made it look. She starts with a large batch of buttercream frosting and adds thin coats, chilling in between each coat of frosting. She uses a bench scraper to help get smooth edges. I put her method to the test and it worked great for me. Head on over to her blog for more great tips.

If you're looking for a fun cake with a more rustic/organic feel, head over to Sweetapolita blog for her "Swirl" method. I used the technique on this cake and I love how it turned out:
 Blue Swirls Cake

Sweetapolita's cakes are always unique and beautiful. You're sure to be inspired by her blog if you love baking as much as I do.

Happy baking!


Sunday, September 2, 2012

Margarita Bouquet

MargBouq3

It's been a great weekend and thanks to the Labor Day holiday, I still have one day left before heading back to work. I just love a 3-day weekend!

This Labor Day weekend traditionally marks the end of summer, although it was 104 degrees today, so I don't think Autumn weather is coming anytime soon for us. We were invited to an end-of-summer party and the invitation said "bring your favorite drink". I would normally bring a sweet treat to the party, but I know my friend loves flowers, so I decided to bring her a "drink" in the form of a festive flower bouquet.

I had seen giant martini and margarita glasses at Target, so I went there to see if they still had them. Of course, that had been several months back at the beginning of summer, so I was unable to find them today. Luckily, Michaels is in the same shopping center and had several of them in stock with the other glass vases. They also had the floral foam and some plastic limes that would work great in the arrangement. Next, I went in search of green flowers. I didn't find any all-green bouquets, but there were a some arrangements with a few green flowers mixed in with other brightly-colored flowers. I wasn't sure how other colors would look in the bouquet, but as it turns out, they looked very pretty and helped break up the green tones.

This was my first time working with the wet floral "oasis" foam, but it's really easy to work with, so I will be using it again the next time I need to make a flower arrangement.

I love how it turned out and I plan to make others in the future:

MargBouq1

Here's how I put it together:

Start with a couple of basic flower arrangements in your choice of colors. You likely will not use all of the flowers, so you can always make another bouquet if you want. You can never have too many flowers!
MargBouqSt1

Grab a giant glass if you can find it or just use several smaller glasses for some cute mini bouquets. I put a regular glass beside the large version so you have a feel for the scale.
MargBouqSt2

Use the floral (wet) foam, also known as floral oasis. The foam absorbs water to keep the flowers fresh. I only used a couple of the blocks for this arrangement.
MargBouqSt3

Allow the foam to soak in water for several minutes:
MargBouqSt4

Crumble some to use as filler around the big block. Soak these crumbles as well:
MargBouqSt5

The foam I found was not an accurate "margarita green", so luckily, I had some lime-green tissue paper on hand, so I stuffed it into the glass hoping that it would look believable.
MargBouqSt6

MargBouqSt7

I tucked plastic wrap inside to help waterproof the paper.
MargBouqSt9

Another layer for good measure:
MargBouqSt8

And provide some extra security with a zip-lock bag liner; I cut off the zipper and used only the bag:
MargBouqSt10

Insert the wet foam into the glass:
MargBouqSt11

MargBouqSt12

Add the crumbles around to fill the gaps:
MargBouqSt13

Cut flowers to the desired length and begin inserting the stems into the foam:
MargBouqSt14

Continue until you've filled in all the gaps:
MargBouqSt15

I added some final details at the end, including a drinking straw, some paper umbrellas and a plastic lime:
MargBouq3

A very festive bouquet!
MargBouq2


Saturday, January 2, 2010

I have a new Nephew!

Our new Nephew was born yesterday, which makes him a NEW YEAR BABY! In anticipation of this, I have been working on a quilt for him to cuddle with and slobber on. :-) It is now finished (short of stitching his name and birth date). We are excited and I am anxious for his Mom to see it, so am hoping to get it shipped off in the next few days.

Quilt

It is full of happy, bright colors.

Little turtles, frogs and duckies:
Quilt2

The backing fabric is a soft, striped flannel:
Quilt3

I hope he will enjoy it.

Saturday, November 14, 2009

Now In Progress


Fabric for a surprise project, which I cannot divulge at this time (in case the person who will be receiving it is reading this).
Results to be posted once it is done!

Sunday, August 16, 2009

Sunny Sunday


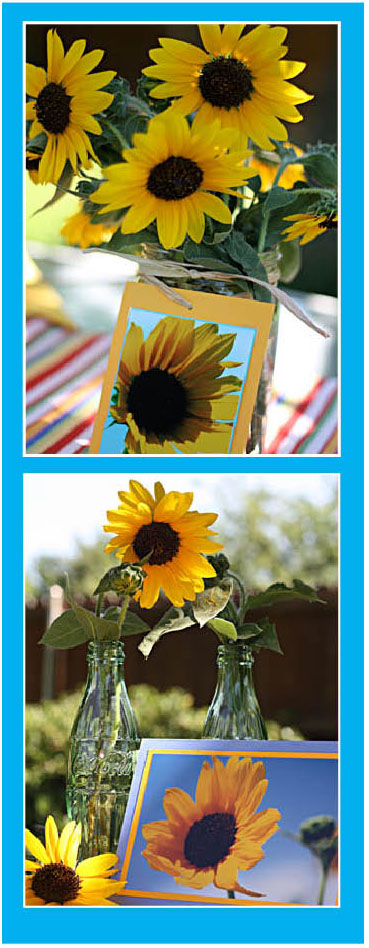
This year, I have been loving the sunflowers that grow wild along the roadside. There seem to be more than ever this summer, maybe due to all the rain we had in the spring. I've captured a few with my camera and thought it would be fun to have prints made and put together some homemade greeting cards.

I also had the idea that for any future flower bouquets given as gifts, I could put a photo of the flowers with it, so that after the flowers fade, the recipient would have a small memento of the bouquet.