Sunday, December 30, 2012

A tea to warm the soul: Yorkshire Gold Tea with Ginger

The rush of Christmas is over and I'm finally able to settle in to get a few things done around the house. I've been puttering around at a slower pace, thanks to a long, 4-day weekend. I love these little stretches of vacation time between work days, first for Christmas and now for New Years. It allows time to rest and rejuvenate and get my creative juices flowing. I've been stationed at my laptop for a couple of days now, finishing up my December Daily photo book. My Mom and I did one last year and carried on the tradition for this year. We each documented our daily activities from December 1 through December 25 and exchanged the books when we were done (we made a copy to keep and a copy to share). I had gotten the idea from a couple of bloggers, Ali Edwards and Cathy Zielske, who fall into the category of "extreme scrapbookers". Check out their blogs if you're into scrapbooking or memory keeping. They are guaranteed to inspire. This year, I've created mine using Shutterfly. I find that it's a quick and convenient way of putting photos together into an attractive book. Last year, I went the old-fashioned, cut-and-paste route with scrapbook paper, rubber stamps and printed photos. It was very time-consuming and I knew that if I wanted to do it again this year in a timely manner, I would need to find a faster way for my sanity's sake. Behold, I bring you Christmas 2012:
ChristmasBookCoverw

PhotoBook

Thanks to a rare Christmas Day snow, I was able to capture the perfect photos for the cover:
HollyBerriesw
Bulbw
These photos make me shiver just looking at them. Since it's been colder, I've been making more hot tea, which brings me to the point of this post -- Yorkshire Gold tea:
Yorkshire Gold
A friend introduced me to this tea a couple of years ago and it's really great on its own. It is a nice and bold black tea. However, I had some candied ginger, so I chopped some and added it to the tea to provide a little more warmth and some little bits to nibble on after the tea is gone. I love the candied ginger, with its sweet and spicy bite.
Candied Ginger
Gold Ginger Tea Cup
This tea really warms the soul.
Gold Ginger Tea


Wednesday, December 19, 2012

Festive Fudge Sampler

Fudge Assortment W
 I've spent the past few weekends in the kitchen doing some serious holiday baking. Two weekends ago, I was making batch after batch of cookie dough. It's easy to make ahead and freeze to allow for baking later when time allows. This past weekend, I switched gears and went into fudge production. I made 4 different varieties of fudge using just one base recipe. I love it when a recipe is versatile and allows for consistent results; therefore, I usually use the tried and true Fantasy Fudge recipe on the back of Kraft Jet-Puffed Marshmallow Cream jar. I just switch out a few of the ingredients to get the fudge flavor I'm looking for. For Christmas, I wanted to incorporate the flavors of the season, so I made Ginger Snap, Eggnog (my favorite), Cinnamon and Créme de Menthe fudge. I was pleased with the results, so I'm sharing my adaptations here:

Ginger Snap Fudge
Ginger Snap Fudge W
Ginger Snap Fudge
3 cups granulated sugar
3/4 cup unsalted butter
One 5 oz. can of evaporated milk (not sweetened condensed milk)
1/2 cup Biscoff spread or Trader Joe's Speculoos Cookie Butter
One 12 oz. bag of white chocolate chips
One 7 oz. jar of Marshmallow Creme
1 tsp. butterscotch flavoring
10-15 Ginger Snaps cookies (crushed)

Prepare a 9-inch square baking dish with parchment paper or foil. I usually spray it with a little cooking spray to help prevent fudge from sticking to the paper when I'm removing it. Set the dish aside.

In a saucepan, combine sugar, butter and evaporated milk and bring to a boil over medium heat. Cook for 4 minutes, stirring constantly (very important, otherwise your ingredients will scorch quickly --speaking from experience, here!) Stir in the Biscoff spread, the bag of white chocolate chips, the marshmallow creme and butterscotch flavoring. Stir until thoroughly mixed.

Pour this in to the baking dish and add crushed ginger snaps cookies on top (You can also mix some into the fudge before pouring if desired). I wanted to be able to see the ginger snaps on top, so I just added them after pouring into the pan.

Allow to set in the fridge for a few hours. After the fudge is firm, remove from pan and cut into squares as desired.

Eggnog Fudge
Eggnog W

Eggnog Fudge
3 cups granulated sugar
 3/4 cup unsalted butter
5 oz Eggnog
One 12 oz. bag of white chocolate chips
One 7 oz. jar of Marshmallow Creme
1 tsp. rum flavoring
1 1/2 tsp. ground nutmeg

Prepare as listed for Ginger Snap fudge, omitting the biscoff and substituting the evaporated milk with eggnog and rum flavoring for butterscotch. Sprinkle nutmeg into the mix and stir well.

Pour into the prepared pan and sprinkle a bit more nutmeg on top.

Allow to set and cut into squares.

Cinnamon Fudge
Cinnamon Fudge W

Cinnamon Fudge
2 cups granulated sugar
1 cup brown sugar
3/4 cup unsalted butter
5 oz evaporated milk
One 10 oz. bag of cinnamon chips
One 7 oz. jar of Marshmallow Creme
1 tsp. vanilla
1 1/2 tsp. cinnamon
Chopped Pecans (optional)

Prepare as listed for Ginger Snap fudge, omitting the biscoff. You'll also substitute 1 cup of white sugar with brown sugar. Substitute white chocolate chips with cinnamon chips. Substitute butterscotch with vanilla. Sprinkle cinnamon into the mix and stir well. Add chopped pecans into the mix if desired.

Pour into the prepared pan and sprinkle a few chopped pecans on top.

Allow to set and cut into squares.

Créme de Menthe Fudge
Creme De Menthe W
Créme de Menthe Fudge
3 cups granulated sugar
3/4 cup unsalted butter
5 oz evaporated milk
One 10 oz. bag of Andes Créme de Menthe baking chips
One 7 oz. jar of Marshmallow Creme
1 tsp. peppermint flavoring
8 crushed Andes Créme de Menthe cookies

Prepare as listed for Ginger Snap fudge, omitting the biscoff. Substitute white chocolate chips with Créme de Menthe chips. Substitute butterscotch flavoring with peppermint flavoring. Mix a few of the crushed cookies into the fudge mixture.

Pour into the prepared pan and add a few more crushed cookies on top.

Allow to set and cut into squares.

Sunday, December 16, 2012

David's Tea Review: Dessert Teas

David's Tea W

I haven't posted about tea in a while. I know, I have been a very bad blogger. This has turned out to be mostly a food/recipe blog, despite it's name (I can't help it, I love to bake!). Every now and then, though, I do post about tea, and if you came here to read about tea, you're in luck! As you know by now, I'm generally not a hot tea drinker, much less hot coffee or even hot chocolate. I'm not very patient, so I don't wait around for things to cool off, and I'm certainly not a sipper. However, I have found some tea that really makes me want to make an exception. Apparently, I have been living under a rock and did not realize the dessert tea phenomenon that is sweeping the nation. One of the blogs I follow, A Beautiful Mess, recently wrote a post about the tea, and right after reading her post, I found myself on the David's Tea website placing my first order. Lucky for me, they have several sampler boxes which enable me to try lots of different teas, since I had considerable difficulty making up my mind. My order came in last week just in time for Christmas, which means I will be making lots of tea for family when they come in for a visit. I have sampled a couple of the flavors already and they are very yummy. The weather has been colder lately, so it is nice to enjoy a hot beverage for a change. Hot tea is finally growing on me!

A picture is worth a thousand words. Check out all of these flavors in one box:
 Tea Box Menu W

A few of the flavors in the winter collection include Alpine Punch, Chocolate Chili Chai, Banana Dream Pie, Cookie Dough and Cocomint Creme:
 Winter Assort W

The Toasted Marshmallow has me dreaming of Smores by the campfire:
Davids Toasted Marshmallow

Just look at all the nuggets of goodness in this tea:
Tea Leaves W

Now, I'm off to enjoy another cup!

Monday, December 10, 2012

Cinnamon Chip Cookies for Santa

CinnamonChipCookiesWeb

It's that time of year again. The season where people retreat into the kitchen to bake up lots of tasty and sweet treats. I love the spices used most this time of year, the warm and inviting flavors of cinnamon, nutmeg and ginger, with fragrances that linger in the kitchen long after the baking is done. If you like those flavors, you'll love these cookies, which use one of my favorite ingredients, cinnamon chips. I discovered these cinnamon chips a couple of years ago. They are hard to come by at any other time of year, so I always stock up around the holidays to get me through the rest of the year. Be sure to set out a big plateful of these cookies for Santa.

CinnamonChipsWeb
Cinnamon chips are the star of this show

Ingredients:
2-1/2 cups all-purpose flour
3/4 cup brown sugar
3/4 cup granulated sugar
2 packets of instant Maple and Brown Sugar oatmeal (I use Quaker brand)
1 tsp. baking soda
1 tsp. salt
1 tsp. pumpkin pie spice
2 sticks melted butter
1 tsp. butterscotch flavoring (may substitute vanilla)
2 eggs
1 10 oz. bag cinnamon chips

Mix dry ingredients with wet ingredients. Add chips in at the end and mix well. Bake in 350 degree oven for 12-15 minutes. Serve with a tall glass of milk and enjoy.


Sunday, September 2, 2012

Margarita Bouquet

MargBouq3

It's been a great weekend and thanks to the Labor Day holiday, I still have one day left before heading back to work. I just love a 3-day weekend!

This Labor Day weekend traditionally marks the end of summer, although it was 104 degrees today, so I don't think Autumn weather is coming anytime soon for us. We were invited to an end-of-summer party and the invitation said "bring your favorite drink". I would normally bring a sweet treat to the party, but I know my friend loves flowers, so I decided to bring her a "drink" in the form of a festive flower bouquet.

I had seen giant martini and margarita glasses at Target, so I went there to see if they still had them. Of course, that had been several months back at the beginning of summer, so I was unable to find them today. Luckily, Michaels is in the same shopping center and had several of them in stock with the other glass vases. They also had the floral foam and some plastic limes that would work great in the arrangement. Next, I went in search of green flowers. I didn't find any all-green bouquets, but there were a some arrangements with a few green flowers mixed in with other brightly-colored flowers. I wasn't sure how other colors would look in the bouquet, but as it turns out, they looked very pretty and helped break up the green tones.

This was my first time working with the wet floral "oasis" foam, but it's really easy to work with, so I will be using it again the next time I need to make a flower arrangement.

I love how it turned out and I plan to make others in the future:

MargBouq1

Here's how I put it together:

Start with a couple of basic flower arrangements in your choice of colors. You likely will not use all of the flowers, so you can always make another bouquet if you want. You can never have too many flowers!
MargBouqSt1

Grab a giant glass if you can find it or just use several smaller glasses for some cute mini bouquets. I put a regular glass beside the large version so you have a feel for the scale.
MargBouqSt2

Use the floral (wet) foam, also known as floral oasis. The foam absorbs water to keep the flowers fresh. I only used a couple of the blocks for this arrangement.
MargBouqSt3

Allow the foam to soak in water for several minutes:
MargBouqSt4

Crumble some to use as filler around the big block. Soak these crumbles as well:
MargBouqSt5

The foam I found was not an accurate "margarita green", so luckily, I had some lime-green tissue paper on hand, so I stuffed it into the glass hoping that it would look believable.
MargBouqSt6

MargBouqSt7

I tucked plastic wrap inside to help waterproof the paper.
MargBouqSt9

Another layer for good measure:
MargBouqSt8

And provide some extra security with a zip-lock bag liner; I cut off the zipper and used only the bag:
MargBouqSt10

Insert the wet foam into the glass:
MargBouqSt11

MargBouqSt12

Add the crumbles around to fill the gaps:
MargBouqSt13

Cut flowers to the desired length and begin inserting the stems into the foam:
MargBouqSt14

Continue until you've filled in all the gaps:
MargBouqSt15

I added some final details at the end, including a drinking straw, some paper umbrellas and a plastic lime:
MargBouq3

A very festive bouquet!
MargBouq2


Saturday, May 26, 2012

One Recipe Two Ways: Featuring Biscoff Spread


 OneRecipeTwoWays

Last week, my family came in for a visit. We hadn't seen them in a few months due to the 1000-mile distance, so we were excited to see them again. We took them on a culinary tour of our town to try a variety of cuisines, including Lebanese, Mexican, Indian and Chinese Dim Sum. I'm pretty sure by the end of their visit, their taste buds were thoroughly confused! After all that eating, on the last day of their visit, we were all wanting something light for breakfast. I made them one of my famous fruit smoothies and toasted some wheat bread accompanied by various jams and spreads. One of the spreads was one of my recently-discovered favorites, Biscoff. My Mom recognized the name from the cookies they received as a snack on one of their flights. Biscoff is great as a spread, but I've also been known to put a spoonful in my morning oatmeal when I'm feeling naughty. It's a great substitute for peanut butter in baking recipes, so I decided to give it a try in a peanut butter bar recipe I found on Pinterest. We're having a get-together with the neighbors tomorrow, so I whipped up a couple of batches for everyone to try -- one using peanut butter and the other using the star of this show, Biscoff!

BiscoffBarCombo

Biscoff Bars:
(Alternate Peanut Butter Bar ingredients in italics)

Base:
2 sticks melted butter
1 cup Biscoff Spread (substitute peanut butter for the Peanut Butter Bar version)
2 cups Biscoff cookie crumbs (see step #2 below for details; substitute graham cracker crumbs in Peanut Butter Bar version)
2 cups powdered sugar

Topping:
1 1/2 cups white chocolate chips (substitute semi-sweet chocolate chips for Peanut Butter Bar version)
4 tablespoons Biscoff spread


1. Melt the butter and 1 cup of Biscoff spread (or substitute with peanut butter for alternate Peanut Butter Bars).

2. Use a food processor to grind up the Biscoff cookies. The full package of 32 cookies makes 2 cups of crumbs, so they work perfectly for this recipe; If you're unable to find the Biscoff cookies, the graham cracker crumbs you would use for the peanut butter version of the recipe would work fine.

3. Mix these crumbs with the melted butter/spread mixture and add 2 cups of powdered sugar. Mix well.

4. Pour this mixture into an ungreased baking dish (9X13 will make thinner bars and 8X8 makes a nice, thick bar; I used 8X8); you can also line the dish with parchment paper to make removal easier.

5. Melt the white chocolate chips (or chocolate chips, if you're doing the peanut butter version) and add the biscoff spread (or peanut butter as desired). Pour this over the cookie mixture and spread evenly. Refrigerate until firm, at least 1 hour.

6. Cut into bars and enjoy!


If you're unable to find Biscoff (locally, I have seen it in the peanut butter aisle at Walmart, Central Market, World Market and Tom Thumb), the peanut butter version of this recipe is just as tasty. Here are the bars I made using peanut butter and graham cracker crumbs:

PBBarCombo

Now, I just have to hold myself back from gobbling them up before our neighborhood gathering tomorrow!


Tuesday, May 1, 2012

Creamy Avocado Soup

AvocadoSoupWeb
Cinco de Mayo is just around the corner. I had never celebrated until I moved to Texas, but it is a fun holiday for my fellow Texan foodies. Our neighbors have a get-together planned for this weekend and we'll be also be doing a potluck at work this coming Friday. Luckily, I work with some great chefs. No, we don't cook for a living, but you would think we did if you experienced one of our famous department potlucks. Just this week, two of my coworkers brought in batches of homemade salsa. One of the recipes featured red wine, cloves and raisins and provided a sweet and spicy kick to my tastebuds. This particular coworker of mine (I'll call him Chef J) has quite the reputation for his creative recipes (Bacon-wrapped strawberries, anyone?).

A few months ago, he gave me this recipe for creamy avocado soup which would be a great starter for a Cinco de Mayo feast; He said I could pass the recipe along, so here is the tasty goodness:

Ingredients:
1 to 1-1/2 cups chopped white/sweet onions
Several sprigs of fresh cilantro (chopped)
Juice of 2 limes
4 Avocados (diced)
3 tsp. chopped garlic
3-4 cups chicken broth
1 cup heavy cream

In a saucepan, sauté the onions and garlic in a bit of oil or butter until onions are translucent. Pour chicken broth into the pan and bring it to a boil. Add lime juice. Add cilantro and the diced avocado. Boil this for 3-4 minutes. Add the mixture to a blender and add the cream. Puree until the mixture is smooth. Pour into bowls and garnish with sour cream if desired.

Saturday, March 24, 2012

Apricot Mandarin Tea

VanAprTeaweb

VanAprPeachPackageweb

Well, it looks like winter is behind us and warmer days are here. It's my favorite season of the year. I will savor these warm and pleasant days because the heat of summer is just around the corner. We'll be needing lots of frosty beverages, especially if it's anything like last summer, with 40 consecutive 100-degree days. I'm building up my tea stash in anticipation of this and I've found a keeper with this one from Tazo. I enhanced it with the juice from a mandarin orange and a bit of sugar, of course.

Ingredients:
3 cups water
1/4 cup sugar
3 Tazo Vanilla Apricot White Tea bags
Juice from 1 mandarin orange

VanAprTeaBagsWeb

BloodMandarinsweb

Bring 3 cups of water and 1/4 cup sugar to a boil to dissolve the sugar.
Once the water comes to a boil, remove from heat and add 3 tea bags. Allow to steep for 5 minutes and discard tea bags. Add the juice of 1 mandarin orange. Chill and serve over ice. Garnish with orange wedges. Serves 2.

Sunday, March 18, 2012

French Macarons

KrissysMacaronsWeb

These little guys have been on my baking bucket list for a while after having seen them on other baking blogs like Bakerella and David Lebovitz. I had put off making them until they made an appearance in my dreams during an afternoon nap. Who else here dreams of making pastries? My dream involved traveling around town searching for almond flour and the perfect Ateco #806 piping tip that Martha Stewart says you need to successfully produce these little gems. Well, the dream turned into reality when I went to Hobby Lobby and Michael's looking for #806 (no luck) and driving to Kroger to find almond flour (score!). You can always make your own flour by grinding up blanched almonds in a food processor, but I found some in the health food section with the rest of Bob's Red Mill products (Thanks, Bob!)

I broke open 3 eggs last night and separated the egg whites to leave out overnight to age. According to several blogs I read, this is an important part of the process. Hopefully, I will not die from Salmonella poisoning.

Today, I whipped up my first batch using this recipe from Martha Stewart and these excellent instructions from the Giverslog blog (the recipe she uses is slightly different, but the instructions are very easy to follow. She also gives troubleshooting tips). This recipe does not require a kitchen scale, which is another reason I avoided making Macarons, until now. The only really time-consuming part of the process is sifting the powdered sugar and almond flour together. The almond flour is a bit more coarse, and needs an extra pass through a sifter. There were a few grains that would not go through the sifter, so I discarded those. The next step of the process is whipping the egg whites. I had read that this is where some bakers fail if there is any sort of grease in the bowl before starting. I wiped down the bowl and beaters with a bit of vinegar to remove any grease and then rinsed with water. I wiped the bowl and beaters dry and began beating the egg whites. After a minute or so of beating, the egg whites began to foam and I added a pinch of salt and began adding sugar a bit at a time. After about 5 or 6 minutes, the mixture began to fluff up into what I assume was the beginning of "soft peak stage". Since I haven't dealt with egg whites that much, I let it beat for a minute longer until the egg whites were stiff and held their shape when the beater was removed from the bowl. At this stage, you can beat a little food coloring in if you want some color; I added a couple of drops of red to get pink).

I added vanilla flavoring and began folding in the almond/confectioners sugar mixture. (basically, turning over the mixture in the bowl with a spatula until the mixture is thoroughly incorporated; I counted around 60 folds). The mixture seemed thick enough to pipe, so I put it into a plastic piping bag fitted with a #12 Wilton piping tip.

I began piping out 3/4" circles of the mixture onto a parchment paper-lined baking sheet. After piping them, I tapped the baking sheet against the counter a couple of times to remove any air bubbles. Then, I left these sitting and drove to Starbucks to get some Chai Tea. Otherwise, I would not have the patience to wait for these to set up as recommended. Allowing them to set for at least 15 minutes is important; apparently this step allows a skin to form on top and prevents cracking during the baking process. When I got back home, I preheated the oven to 375 degrees and lightly touched one of the Macarons to see if it had set and determined that it had, so I put the first batch in the oven. I propped the door open slightly with a wooden spoon to keep it from becoming too hot (this is another common problem that can cause cracking). I should have kept an eye on them because the first batch browned way too quickly. Some of them cracked and some of them had a nice smooth top. I'm assuming they cracked because I did not let them set long enough.

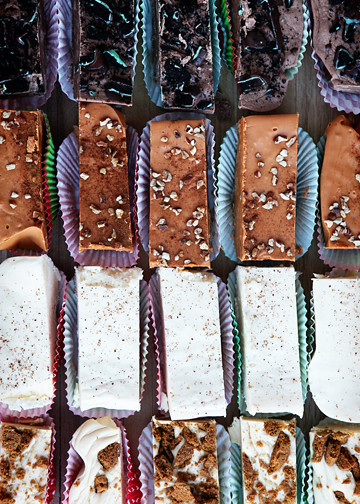
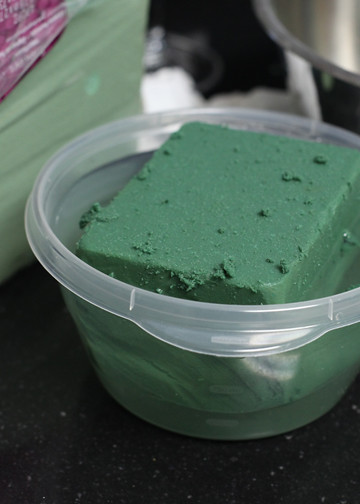
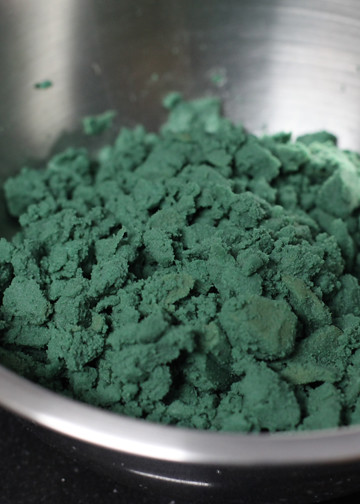
I decided to make a 2nd batch of chocolate ones. I repeated the process, except this time, I did not age my egg whites. I wanted to see if it made a difference, and as it turns out, it did not seem to matter. I sifted in 3 tablespoons of unsweetened cocoa powder in with the almond/confectioners sugar and mixed that with the beaten egg whites and vanilla. The mixture seemed a bit thicker due to the added cocoa powder, but it still piped without a problem. I let them set for about 30 minutes before baking and that seemed to help the cracking problem. I baked them for around 15 minutes to be sure they did not overbake. The 2nd batch was a success with only 1 cracked cookie and no burned edges!

I filled these with basic buttercream and nutella/buttercream mixture.

Macaron Ingredients:

1 1/4 cups confectioners' sugar
1 1/2 cups Bob's Red Mill almond meal/flour
3 Tablespoons unsweetened cocoa powder (optional)
Whites from 3 large eggs
Pinch of salt
1/4 cup granulated sugar
1/4 teaspoon vanilla extract
food coloring (optional)


Directions:

Preheat oven to 375 degrees. Sift confectioners' sugar and almond flour into a bowl. Whisk in almonds; set aside. Line 2 baking sheets with parchment paper.

Put egg whites in the bowl of an electric mixer fitted with the whisk attachment. Beat on medium speed until foamy, then beat in salt. Beat in granulated sugar, 1 teaspoon at a time, until medium-soft peaks form.

Using a rubber spatula, fold half the almond/cocoa mixture into the whipped egg white mixture until just incorporated. Fold in vanilla, food coloring, and remaining almond mixture until just incorporated. Firmly tap bottom of bowl on counter to eliminate air pockets.

Transfer mixture to a pastry bag fitted with a round tip (I used Wilton #12). Pipe mixture into 3/4" to 1" circles on prepared baking sheets. Try to keep them all the same diameter. Bake until macarons are slightly firm and can be gently lifted off parchment (bottoms will be dry), around 15 minutes for me, but time in oven can vary. Let cool on sheets 5 minutes and remove from paper. They should be easy to peel off. Be careful not to crack them because they are fragile.

Make Buttercream by mixing together:
1 stick butter (softened)
1/2 bag powdered sugar
1 tsp vanilla

Pipe buttercream onto one of the cookies and sandwich together with another cookie. Enjoy!

Thursday, February 23, 2012

Spanish Natillas

NatillasWeb1

Travel has a way of awakening all of the senses. The minute you arrive at a new destination, you are surrounded by new and exciting things. You experience a change of pace, either in the rush of a fast moving city or the slow tranquility of a tropical destination. Before arriving, you may have preconceived notions of a place and may be surprised once you arrive and find it is nothing like you had imagined. This adds to the adventure of exploring a new place.

One of my favorite things about travel is having the opportunity to try new foods. In my travel research, I will often make a list of the foods I want to try and make it a point to find those things as quickly as possible upon arrival.

A few years back, my husband and I went with some friends to Spain. Our friend was originally from Spain and was making the trip back to visit his relatives and old friends. This trip was especially exciting because we had the rare opportunity of seeing the country through the eyes of the locals and actually feeling like one of the locals. We had the inside scoop on all of the best sights and foods. We sampled the tastiest dishes, including Paella, Jamon, Chorizo, Tortillas, Conejo (rabbit), and Croquetas. I especially enjoyed the pastries and sweets. One of my favorite desserts was Spanish Natillas, which is a type of egg custard. I vowed to find the recipe and make it when I returned from my trip.

Since then, I have tried a few different recipes and haven't been satisfied with the results until now. I found this recipe, but I decided to tweak it a bit because the recipe called for lemon and I specifically remembered tasting cinnamon in the batches I had tasted in Spain. Aside from the lemon, the other ingredients seemed accurate, so I gave it a try, adapting it based on the ingredients I had on hand.

The resulting custard was mostly as I remembered from Spain, but was a bit more runny. The next time I make it, I will add more cornstarch; the recipe below takes that into account, adding 6 Tablespoons instead of the 5 from the original recipe.


Spanish Natillas

Ingredients:
4 Egg Yolks
2 Cups Heavy Cream
2 Cups Milk (I only had skim milk on hand, which is why I decided to incorporate the heavy cream to add the richness this custard needs)
5 Tablespoons of Cornstarch (original recipe called for 4, but it was too runny)
8 Tablespoons Granulated Sugar
1/2 of a Vanilla Bean (split so that it will release the little vanilla seeds when cooking)
1 Cinnamon Stick
1 Teaspoon Ground Cinnamon
Maria Cookies (optional); shown here:
MariaCookies


1. In a bowl, mix half of the milk and half of the cream in a bowl with the egg yolks and corn starch. Set aside.

2. In a sauce pan on the stovetop (set to medium heat), add the remaining milk and sugar. At this point, you can also add the cinnamon stick, ground cinnamon and split vanilla bean. Mix slowly, but stir constantly to prevent milk from burning. It should be hot, but not boiling. Keep stirring.

3. Take a few spoonfuls of the heated milk mixture from the saucepan and add it to the bowl of milk/eggs that you have set aside. Stir well. This will help temper (bring up to temperature) the mixture to avoid scrambling the eggs once you add the eggs and milk to the mixture on the stovetop. Slowly add the mixture from the bowl to the milk and sugar that are heating on the stovetop. Continue stirring and allow the mixture to cook for another couple of minutes. The mixture will begin to thicken a bit and should no longer taste like cornstarch. If you still taste cornstarch, allow it to cook a bit longer.

4. Remove the mixture from the stovetop and strain into a bowl with a fine sieve. This will remove any clumps you have and you won't have to worry about trying to fish out the cinnamon stick or vanilla bean from the hot custard.

5. Pour the custard into small ramekins (or into one large dish, if you prefer); Add a Maria cookie on top for decoration (this is how I remember them from Spain; luckily, I was able to find them here in my local market).

6. Allow these to cool at room temperature and then put them in the fridge so they will firm up. Keep refrigerated until serving.

Enjoy!
Natillas3Web